Build a mapping with the Mapping Creator¤
Introduction¤
This beginner-level tutorial builds a Knowledge Graph from a hierarchical XML file with the Mapping Creator of eccenca Corporate Memory.
The Mapping Creator connects a source schema to a target schema visually. Instead of adding one mapping rule after another, the target schema is assembled from classes and properties of a vocabulary, and the source elements are connected to it by drag-and-drop or by AI-generated suggestions.
The tutorial works workflow first. It starts with an empty workflow and creates every item from inside the workflow editor: the dataset from the dropped file, the transformation from the dataset, and the Knowledge Graph from the transformation. The workflow is the place where the pipeline is visible as a whole, and running it builds the Knowledge Graph in one step.
Along the way the tutorial uses the features of the Mapping Creator: adding classes and properties from a vocabulary, direct mappings by drag-and-drop, AI suggestions with their reasons, nested entities, the direction and the role of a property, focus mode, and the editor for a saved mapping rule. Mapping Creator describes the same features as a reference.
The result is a Knowledge Graph of departments, their managers, their employees, and the products a department is responsible for.
Configuration
The Mapping Creator must be activated, and the suggestion features need a configured Large Language Model. See Mapping Creator and LLM Configuration.
Tutorial
The material of this tutorial is part of a Marketplace Package. Install this package
- by using the web interface ( Packages → Search → “Product Data Demo”) or
-
by using the command line interface
Sample material¤
The following material is used in this tutorial. Download both files and keep them at hand.
-
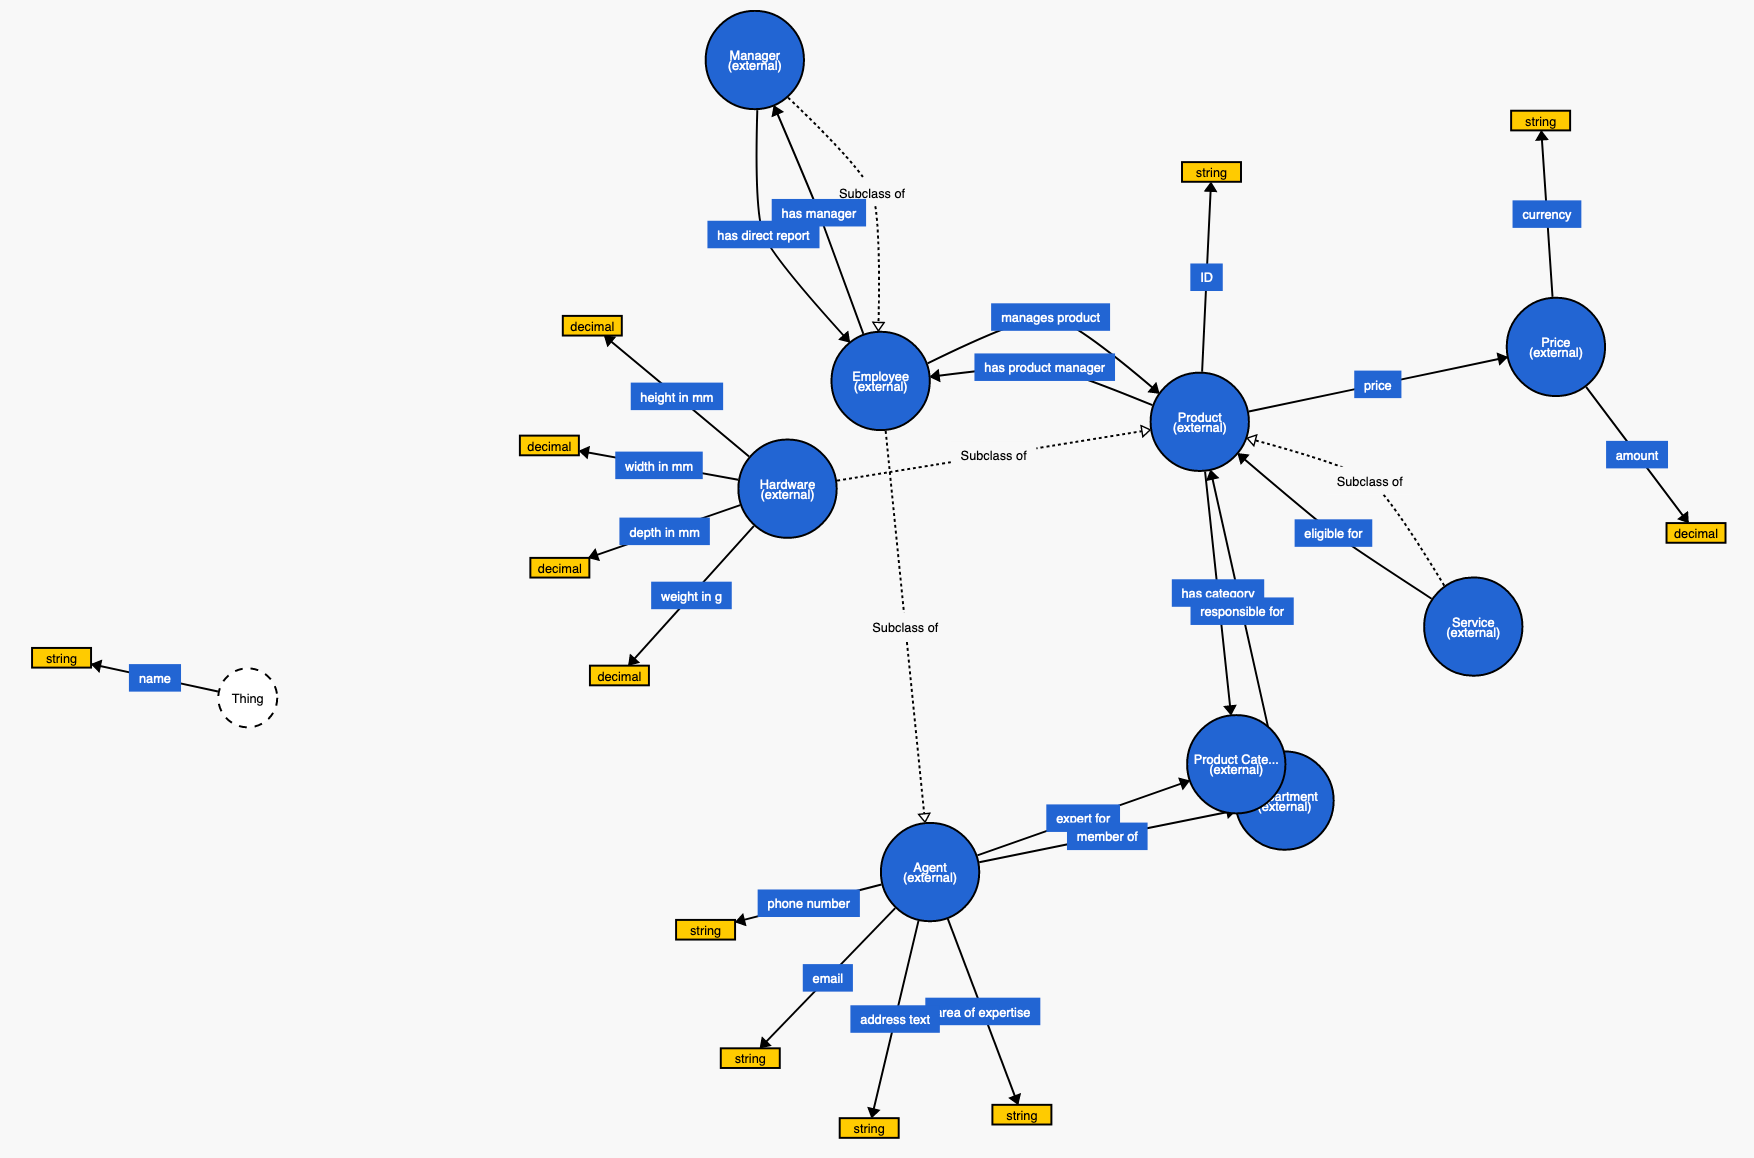
Vocabulary which describes the target structure of the Knowledge Graph: products_vocabulary.nt
-
Source file with the organizational structure of a company: orgmap.xml
Info
The file contains six departments. Each department carries an
idand aname, onemanager, a list ofemployeeelements, and lists ofproductandservicereferences:<orgmap> <dept id="73191" name="Engineering"> <manager> <email>Thomas.Mueller@company.org</email> <name>Thomas Mueller</name> <address>Karl-Liebknecht-Straße 885, 82003 Tettnang</address> <phone>+49-8200-38218301</phone> </manager> <employees> <employee> <email>Corinna.Ludwig@company.org</email> <name>Corinna Ludwig</name> <address>Ringstraße 276</address> <phone>+49-1743-24836762</phone> <productExpert>Memristor, Gauge, Encoder</productExpert> </employee> … </employees> <products> <product id="Z249-1364492" /> … </products> <services> <service id="I241-8776317" /> … </services> </dept> … </orgmap>
1 Install the vocabulary¤
The vocabulary provides the classes and properties the mapping maps the XML data to.
-
Click the Knowledge graphs icon in the main menu under EXPLORE.
-
In the Graphs drop-down, click Add new graph and select New graph from File.
-
Select the
products_vocabulary.ntfile, confirm the Target graph URIhttp://ld.company.org/prod-vocab/, select the Add new graph checkbox, and click Upload.
2 Create the project¤
-
Click the Projects icon in the main menu under BUILD.
-
Click Create new in the top right corner.
-
Select Project and click Add.
-
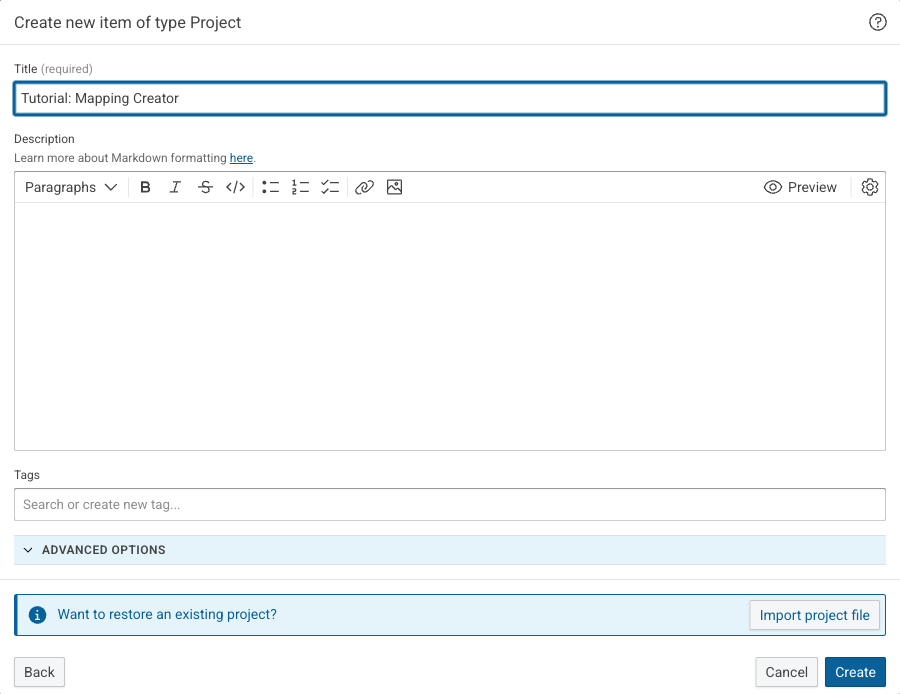
Enter the following value:
- Title:
Tutorial: Mapping Creator
- Title:
-
Click Create.
The project page opens.
-
Click the pencil icon next to Prefix in the Configuration panel.
-
Enter the following values under Add project prefix and click Add:
- Prefix:
pv - URI:
http://ld.company.org/prod-vocab/
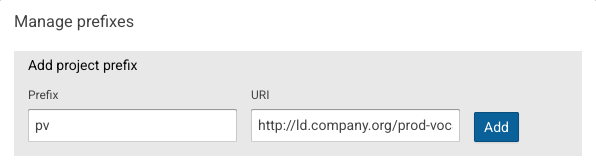
With the prefix, the Mapping Creator shows the classes and properties of the vocabulary as
pv:Departmentandname (pv)instead of their full IRIs. Define prefixes / namespaces explains project prefixes in detail. - Prefix:
-
Click Close.
3 Create the workflow¤
The workflow holds the whole pipeline, from the XML file to the Knowledge Graph.
-
Click Create workflow in the Contents of the project.
In a project that already contains items, click Create new, select Workflow, and click Add instead.
-
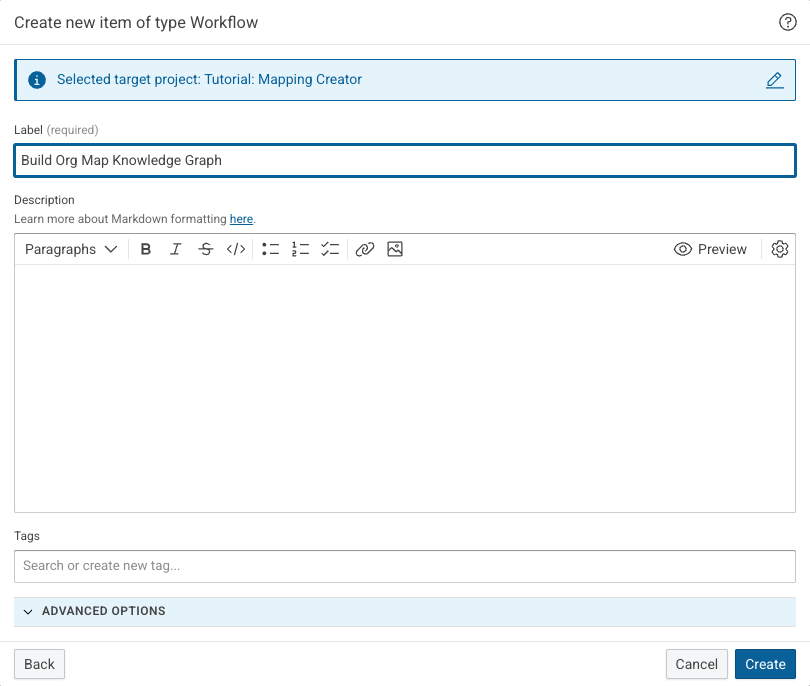
Enter the following value:
- Label:
Build Org Map Knowledge Graph
- Label:
-
Click Create.
The workflow page opens with an empty Workflow editor.
-
Click the icon of the Workflow editor to use the full browser window.
4 Add the XML file to the workflow¤
-
Drag the
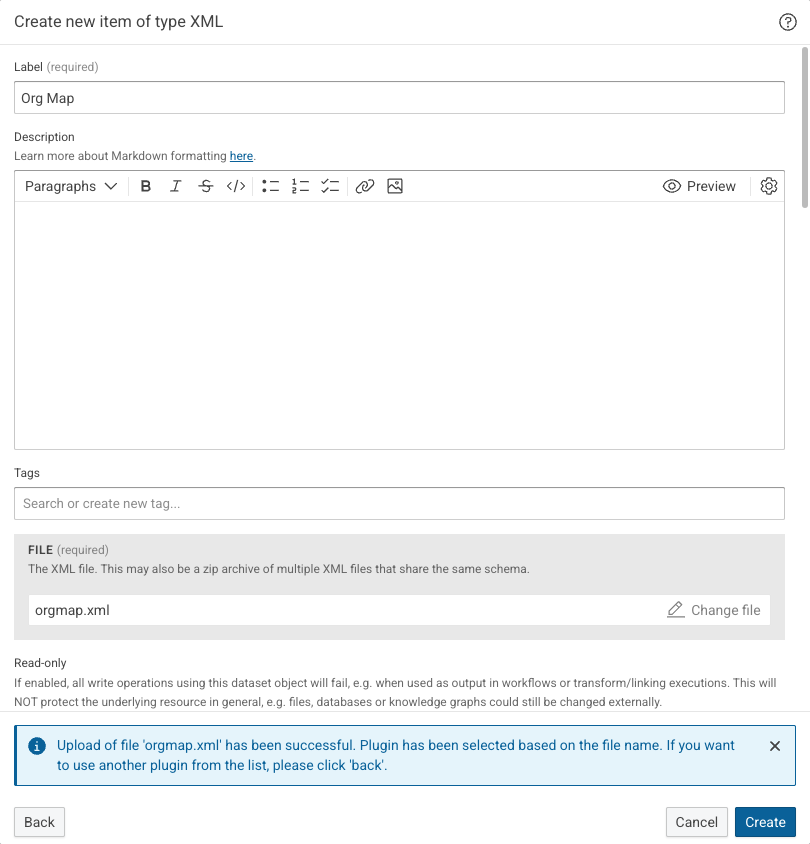
orgmap.xmlfile from the file manager of the operating system and drop it on the canvas of the workflow editor.The file is uploaded, and the Create new item of type XML dialog opens with the XML type preselected for the file.
-
Enter the following value:
- Label:
Org Map
- Label:
-
Expand ADVANCED OPTIONS and disable Streaming.
Streaming reads large XML files without holding them in memory, but it does not support backward paths. The mapping built in this tutorial navigates from the manager of a department back to its employees, which is such a path.
-
Click Create.
The
Org Mapdataset appears on the canvas.
5 Create the transformation¤
A transformation task holds the mapping rules. Its Type defines which XML element becomes one entity of the Knowledge Graph.
-
Click the dot on the right of the
Org Mapnode and select Connect to newly created Transformation.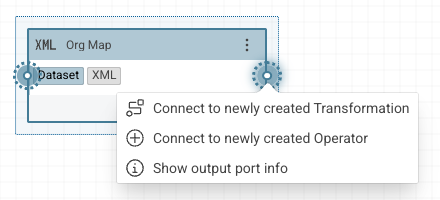
-
Enter the following values:
- Label:
Lift Departments - Type:
dept
Input is already set to
Org Map, the dataset the transformation is connected to.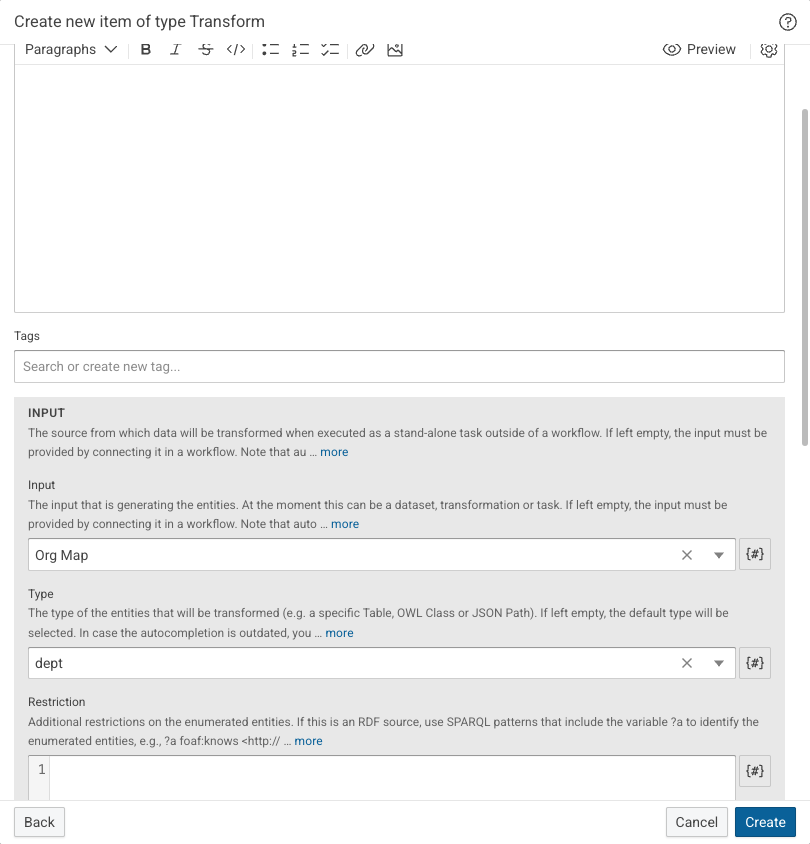
- Label:
-
Scroll down to Target vocabularies, select Select individual vocabularies, and select
pv: Products - Vocab.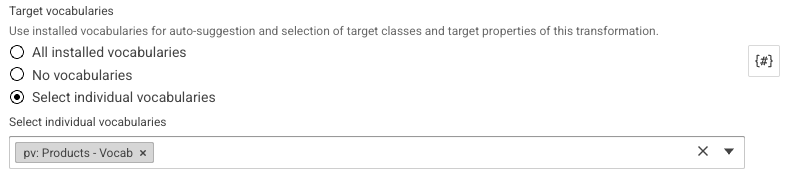
Restricting the vocabularies keeps the class and property lists of the Mapping Creator short.
-
Click Create.
The transformation appears on the canvas, connected to
Org Map. -
Click Save in the workflow editor.
6 Open the Mapping Creator¤
-
Click the menu of the
Lift Departmentsnode and select Mapping editor.The transformation opens in a window over the workflow.
-
Select the Mapping creator (beta) tab.

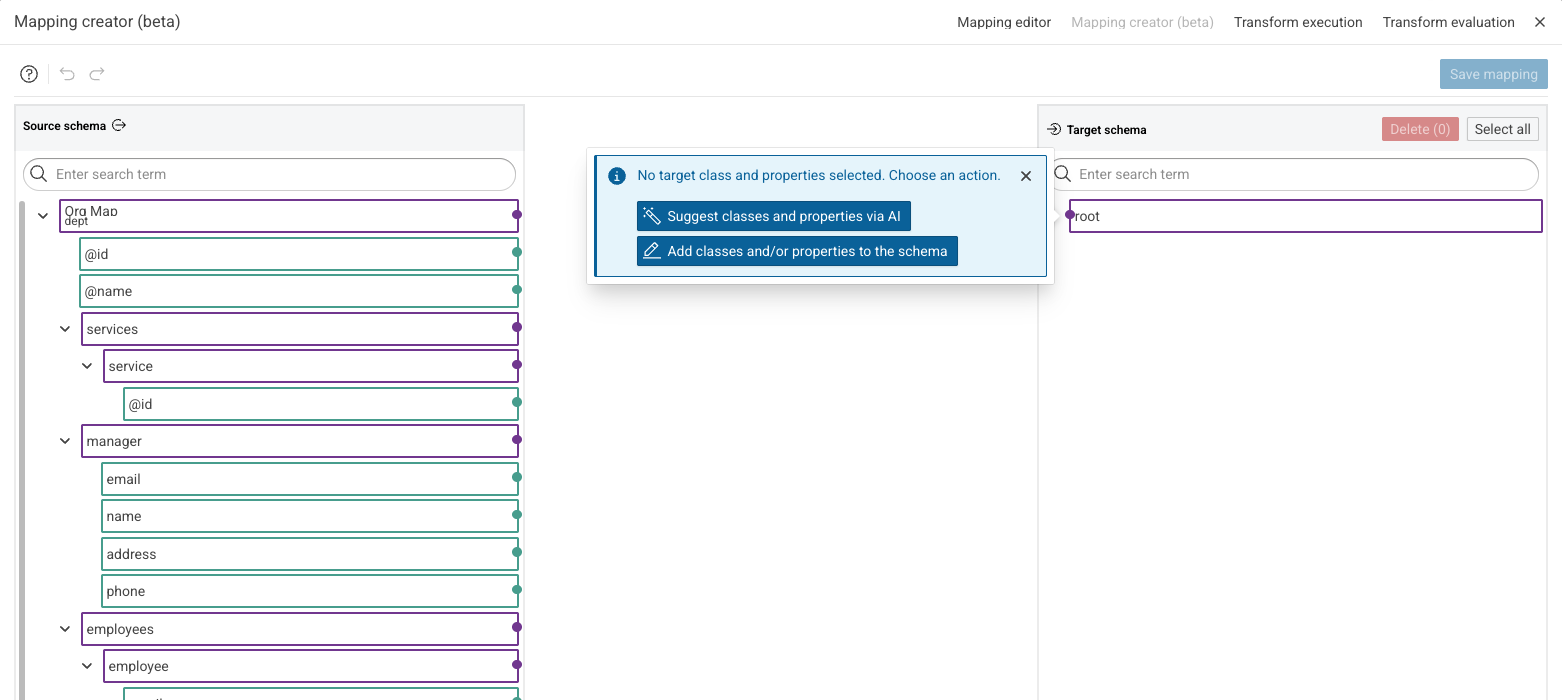
The Mapping Creator consists of three parts:
- the Source schema on the left, the paths of the
orgmap.xmlfile - the Target schema on the right, the classes and properties the data is mapped to
- the connections between both, drawn in the area in the middle
Both schemas have a search field, and each element with children can be collapsed and expanded.
Color legend and tour¤
Every color and line type in the editor has a meaning. Click the help icon to reach three entries.
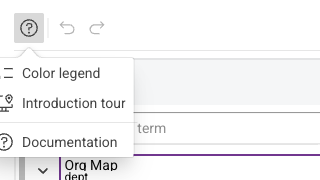
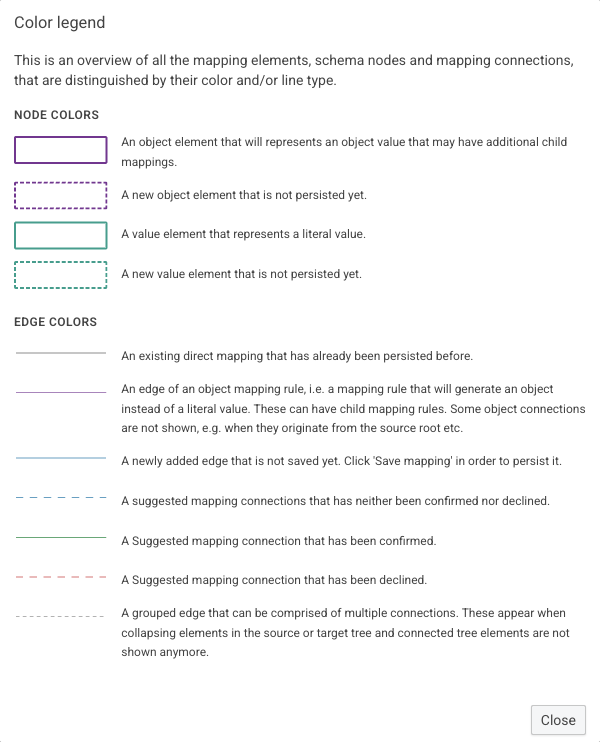
- Color legend explains the node and edge colors.
- Introduction tour walks through the editor step by step.
- Documentation opens the Mapping Creator reference.
Select Color legend and keep the meaning of the dashed lines in mind: a dashed element or connection is not saved yet.
7 Add the target class¤
A mapping starts with a target class. The target class defines what the entities of the Knowledge Graph are.
-
Click Add classes and/or properties to the schema and select Add class.
Tip
Suggest classes and properties via AI starts from the other side: the AI proposes the classes of the selected vocabularies that fit the source data best.
-
Enter
Departmentin the search field and select thepv:Departmententry. -
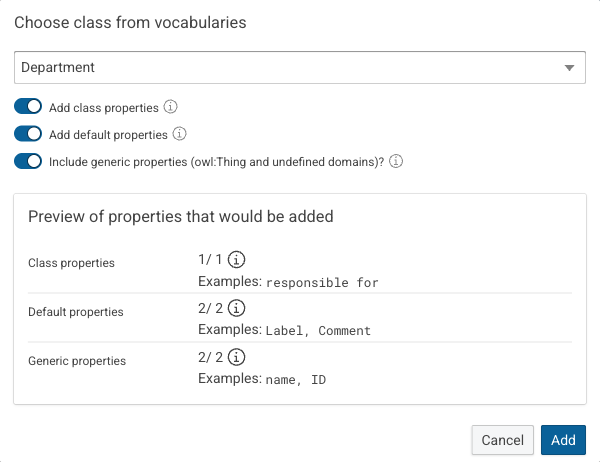
Enable all three switches:
- Add class properties adds the properties whose domain is the class or one of its super-classes.
- Add default properties adds well-known properties such as
rdfs:labelandrdfs:comment. - Include generic properties (owl:Thing and undefined domains)? adds properties without an explicit domain, such as
pv:nameandpv:id.
The first two switches are enabled by default. Preview of properties that would be added shows how many properties each option contributes.
-
Click Add.
The target schema now holds the
Departmentclass and five properties. All of them are dashed: nothing is saved yet, and a property that stays unconnected is not written to the transformation at all.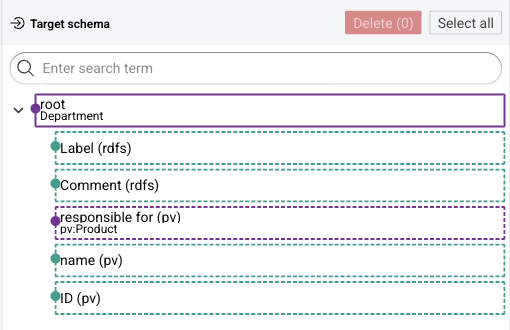
8 Map a value by drag-and-drop¤
Drag from the dot on the right of a source element to the dot on the left of a target element to create a mapping.
Drag @name onto name (pv).
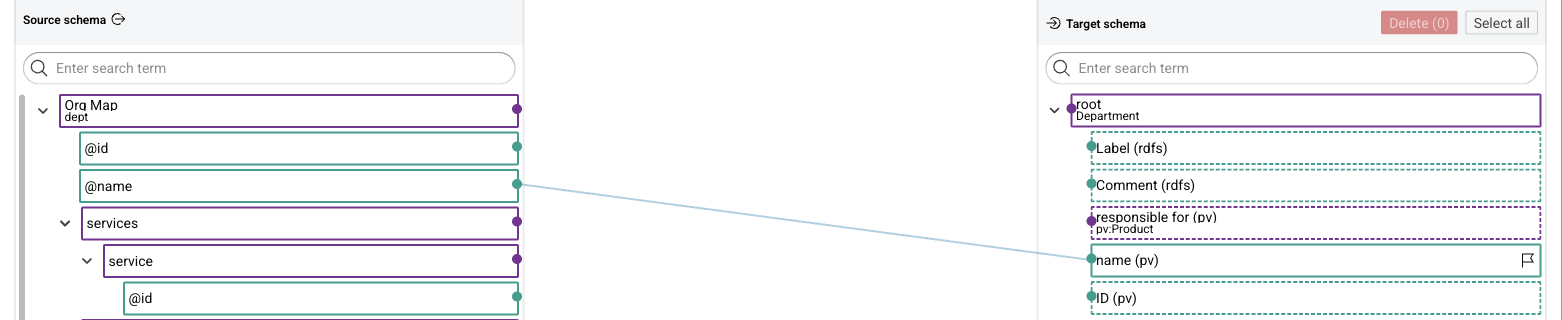
The new connection is drawn as a solid line in the “not saved yet” color, and the target element loses its dashed border.
9 Generate property mappings with AI¤
The magic wand generates mapping suggestions for the direct children of a target element.
Info
This step needs a configured Large Language Model. Without one, map the remaining properties by drag-and-drop as in step 8.
-
Hover over the root element of the target schema to show its action icons.

From left to right: suggest classes and properties via AI, focus element, element menu, and collapse or expand all children.
-
Click the magic wand.
-
Read the AI disclaimer and click Close.
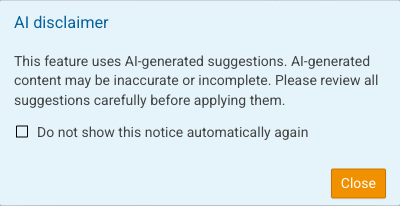
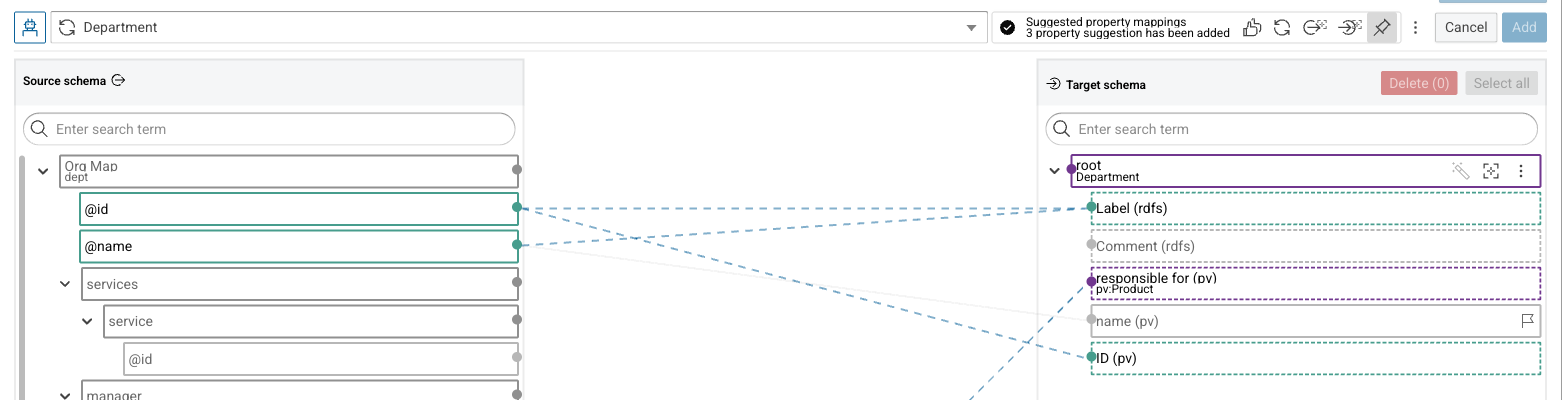
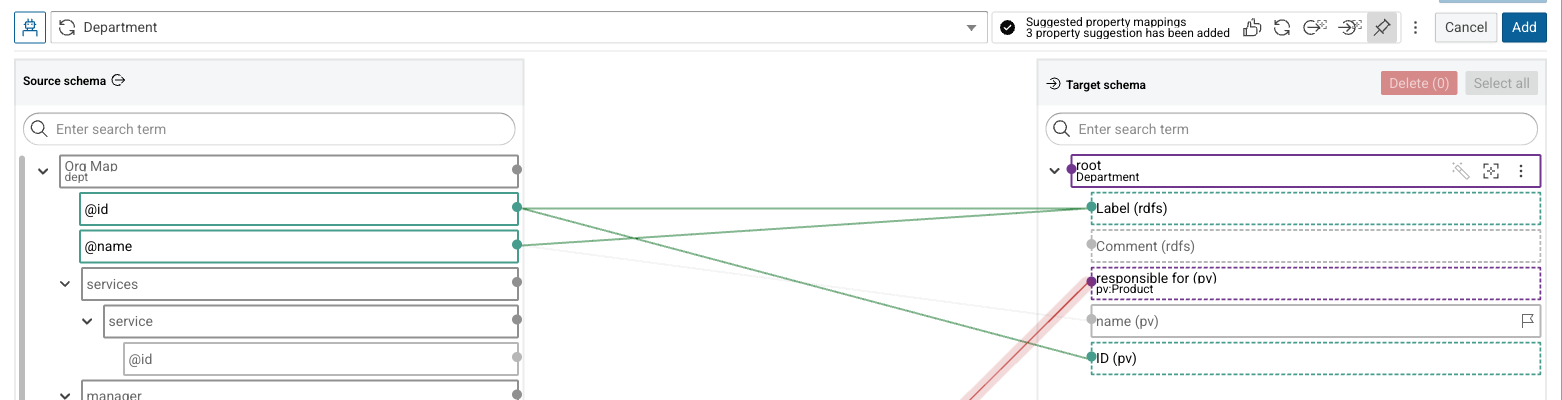
The editor switches to the suggestion mode. Suggested connections are drawn as dashed blue lines, and a toolbar above the schemas collects the actions for the whole set of suggestions.
-
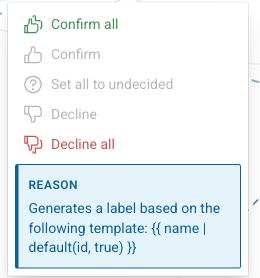
Click a suggested connection to decide on it.
The menu offers Confirm, Set to undecided, and Decline, and REASON states why the suggestion was made. A suggestion that combines several source elements into one rule also offers Confirm all and Decline all.
-
Work through the suggestions and check the source element of each one.
The suggestions are generated for every run and can differ from the ones described here. Typical suggestions for the department are:
Label (rdfs)from@name, possibly combined with@idby a template. Confirm it.ID (pv)from@id. Confirm it.responsible for (pv)fromproducts. Decline it:productsoccurs once per department, so the mapping would create a single product per department instead of one product perproductelement.
A confirmed connection turns green, a declined one turns red.
-
Click Add.
The confirmed suggestions become connections, the declined ones are discarded.
10 Map the products¤
responsible for (pv) is an object property: it does not carry a value, it points to another entity.
Connecting it to a source element defines which element becomes that entity.
Tip
Collapse the services, manager, and employees source elements to bring products into view.
A connection can only be drawn between two dots that are both visible.
-
Drag
products/productontoresponsible for (pv).One
Productentity is created perproductelement. -
Hover over
responsible for (pv), click the element menu, and select Add properties → Add property from vocabularies. -
Enter
IDin the search field and select theID (value)entry with the IRIhttp://ld.company.org/prod-vocab/id.pv:idis a datatype property, so Add as object property stays switched off and the direction options below it remain inactive. -
Click Add.
-
Drag
products/product/@idonto the newIDelement.
11 Add the manager as a nested entity¤
The department manager is a separate entity of the Knowledge Graph, connected to the department.
No property of the Department class points to a Manager, so the property is taken from the vocabulary directly.
-
Hover over the root element of the target schema, click the element menu, and select Add properties → Add property from vocabularies.
-
Enter
has managerin the search field and select thehas manager (object)entry. -
Keep Add as object property enabled and Connect from parent element selected.
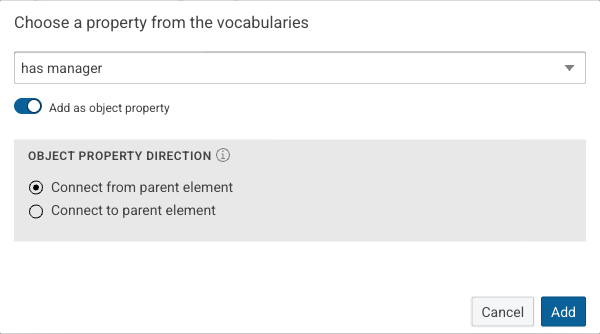
OBJECT PROPERTY DIRECTION decides which of the two entities is the subject of the generated triple. Connect from parent element writes
Department pv:hasManager Manager. Connect to parent element reverses it and writesManager pv:hasManager Department. -
Click Add.
The new element carries the range of the property,
Manager, as its class. -
Expand
managerin the source schema and drag it ontohas manager. -
Click the magic wand of
has managerand close the disclaimer. -
Check the source element of each suggestion.
Decline every suggestion whose source lies outside
manager. A suggestion forID (pv)from@id, for example, uses the identifier of the department and not of the manager. -
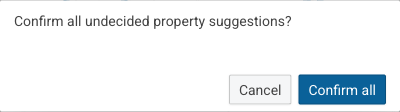
Click in the toolbar to confirm all remaining suggestions and confirm the dialog with Confirm all.
-
Click Add.
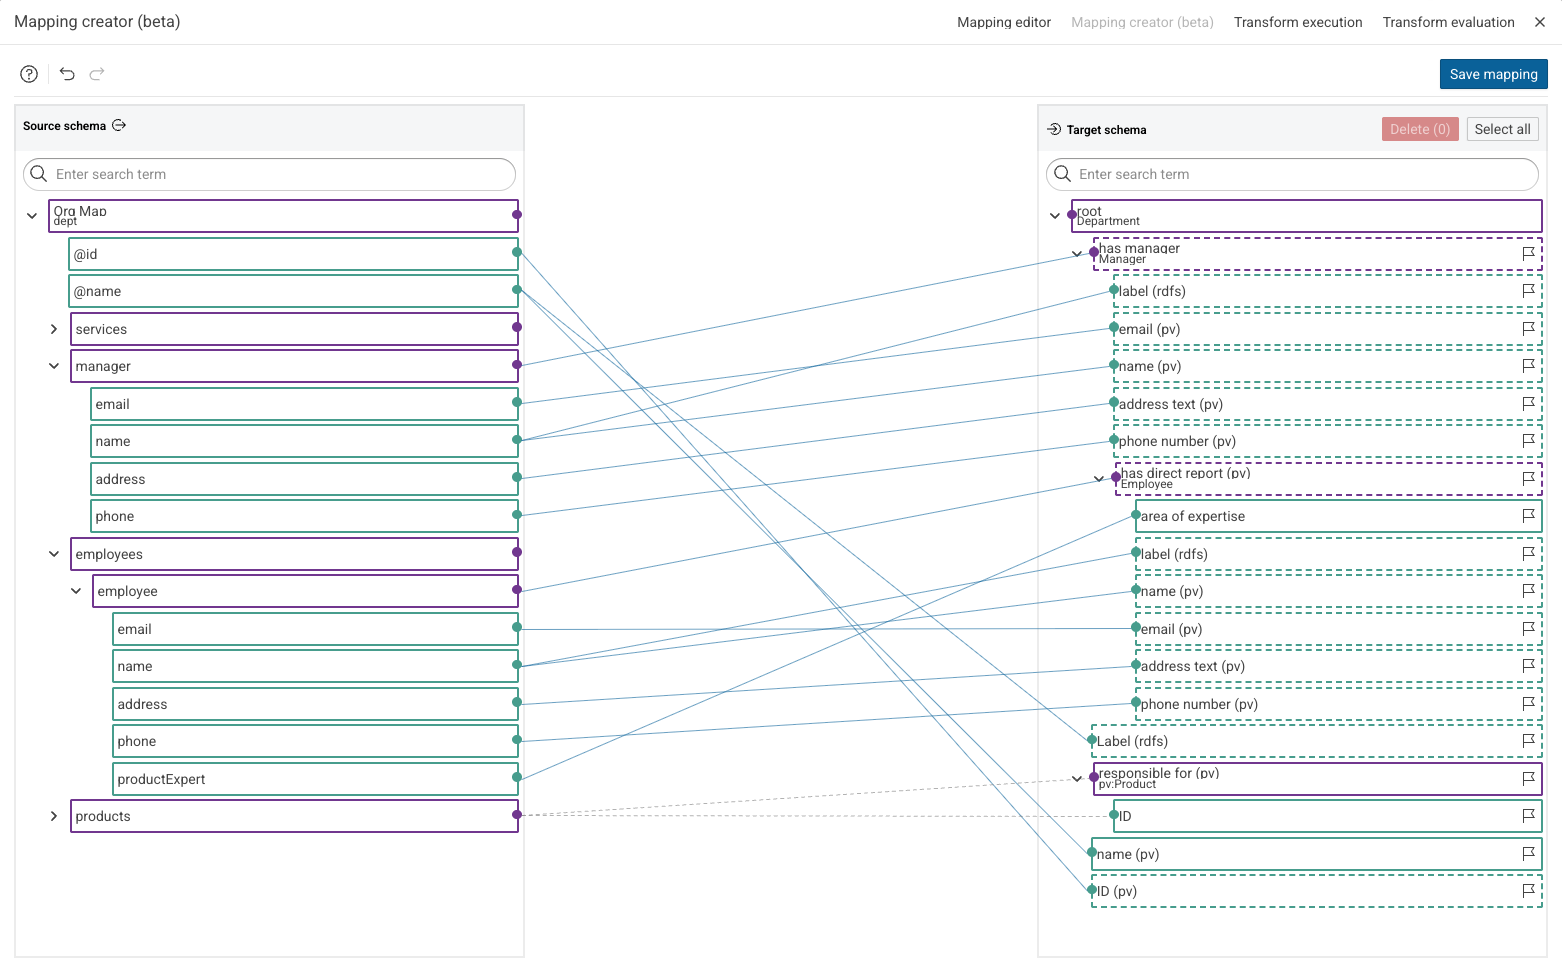
The manager is mapped with a label, an email address, a name, an address, and a phone number.
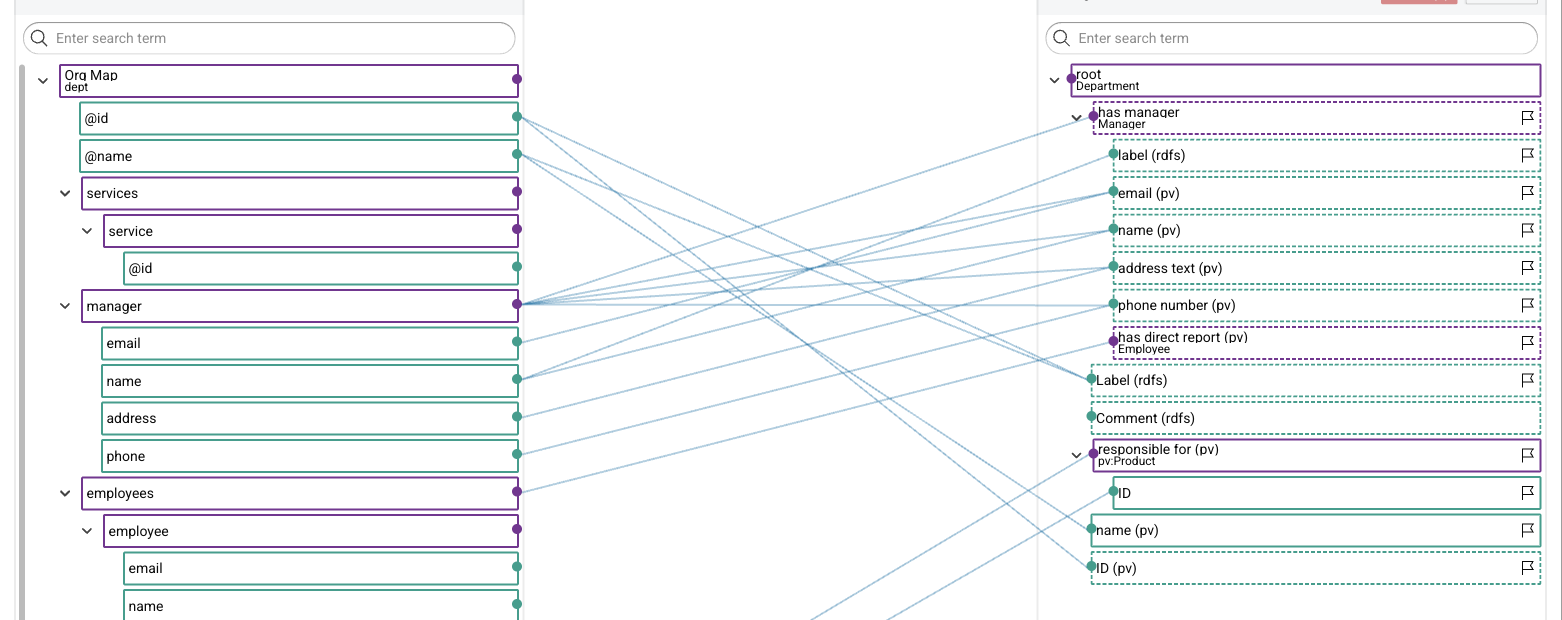
12 Map the employees¤
The suggestions for the manager also propose has direct report (pv), which points from the manager to the employees of the department.
-
Expand
employeesin the source schema and check which source elementhas direct report (pv)is connected to.The connection must start at
employees/employee, not atemployees.employeesoccurs once per department and would produce one employee per department. -
If the connection starts at
employees, click it and select Delete.
-
If the connection was deleted, drag
employees/employeeontohas direct report (pv). -
Click the magic wand of
has direct report (pv)and close the disclaimer. -
Expand
managerandemployees/employeein the source schema.A collapsed source element bundles the connections of its children into one line, which hides where a suggestion starts.
-
Decline every suggestion whose source lies outside
employees/employee.Examples are
has manager (pv)frommanager, which repeats a relation the mapping already describes, andID (pv)orname (pv)from the@idor@nameof the department. When a suggestion combines an employee element with such a source, click the connection from the wrong source and select Decline, not Decline all. -
Confirm the remaining suggestions and click Add.
-
Check that every property below
has direct report (pv)is connected to an element ofemployees/employeeonly.Delete any remaining connection from an element of
manager: click it and select Delete. -
Add the area of expertise, which the suggestions do not cover.
-
Open the element menu of
has direct report (pv)and select Add properties → Add property from vocabularies. -
Enter
expertisein the search field and select thearea of expertise (object)entry. -
Disable Add as object property.
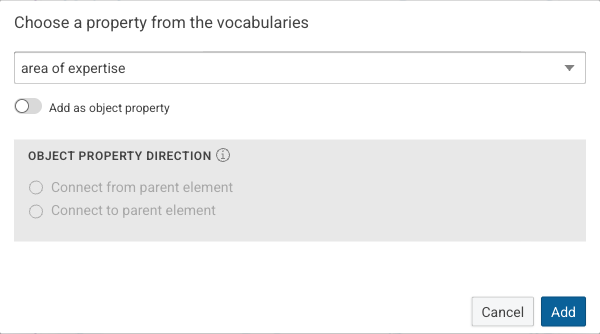
pv:areaOfExpertiseis defined as an object property, but theproductExpertelement holds a text. Disabling the switch uses the property in the role of a datatype property, so the text is written as a literal. -
Click Add.
-
Drag
productExpertonto the newarea of expertiseelement.
-
Focus mode
The target schema now spans three levels of entities. Click the focus icon of an element to show only that element, its parent, and its direct children.
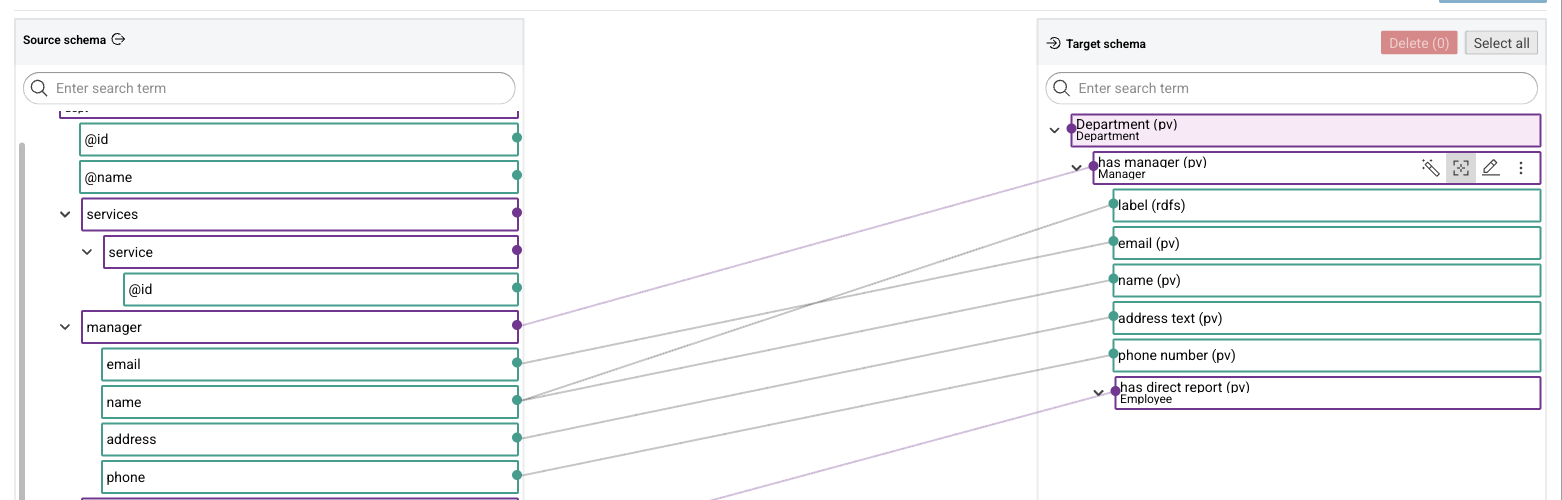
Click the icon again to show the whole schema.
13 Remove unused elements and save¤
Target elements that stay unconnected are not written to the transformation, but removing them keeps the editor readable.
-
Hover over
Comment (rdfs)and select its checkbox on the right.Delete in the header of the target schema counts the selected elements.
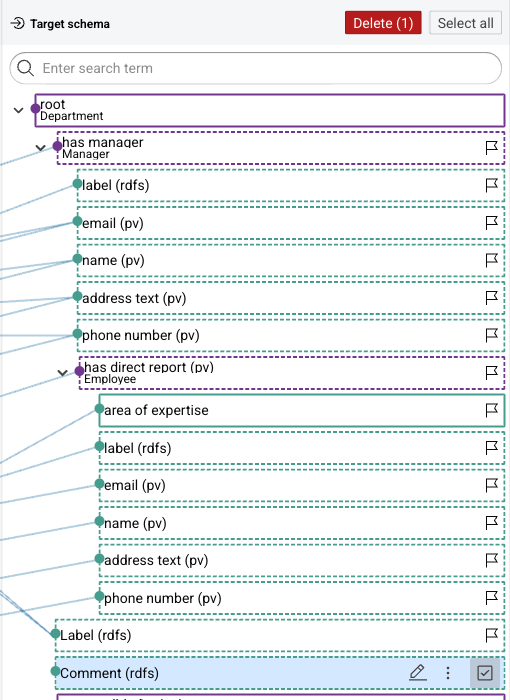
-
Click Delete (1) and confirm.
Tip
and in the toolbar revert and repeat the steps taken since the editor was opened.
-
Compare the result with the mapping below.
-
Click Save mapping.
The mapping rules are written to the transformation task. All elements and connections change to the saved colors, and the root element is renamed to
Department (pv).
14 Set a custom URI pattern¤
Without a URI pattern, the entities of the Knowledge Graph get generated identifiers. A pattern built from the source data produces stable and readable IRIs.
-
Click the
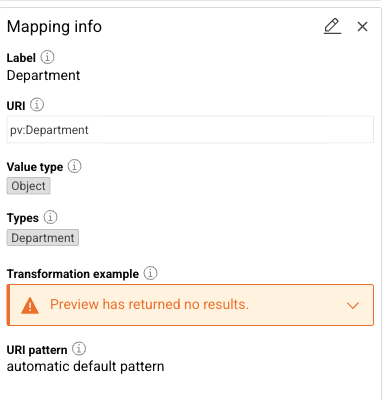
Department (pv)element.The Mapping info sidebar shows the saved mapping rule.
-
Click the pencil icon in the sidebar.
-
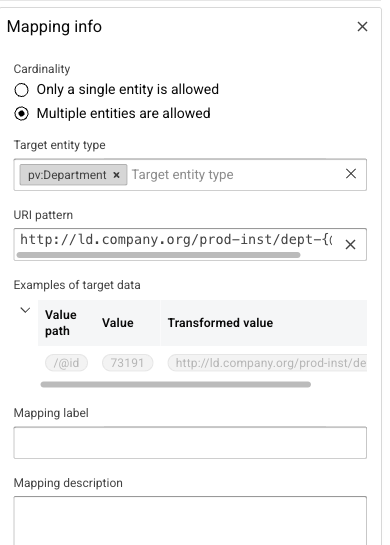
Click Create custom pattern and enter the following value:
- URI pattern:
http://ld.company.org/prod-inst/dept-{@id}
Examples of target data shows the IRI the pattern produces for the first department once the field loses focus.
- URI pattern:
-
Click Save.
Note
The same editor sets the URI pattern of a nested entity such as
has manager (pv), and Mapping label and Mapping description document a rule for the next reader. Cool IRIs explains how to choose an IRI scheme.
15 Evaluate the transformation¤
-
Select the Transform evaluation tab.
-
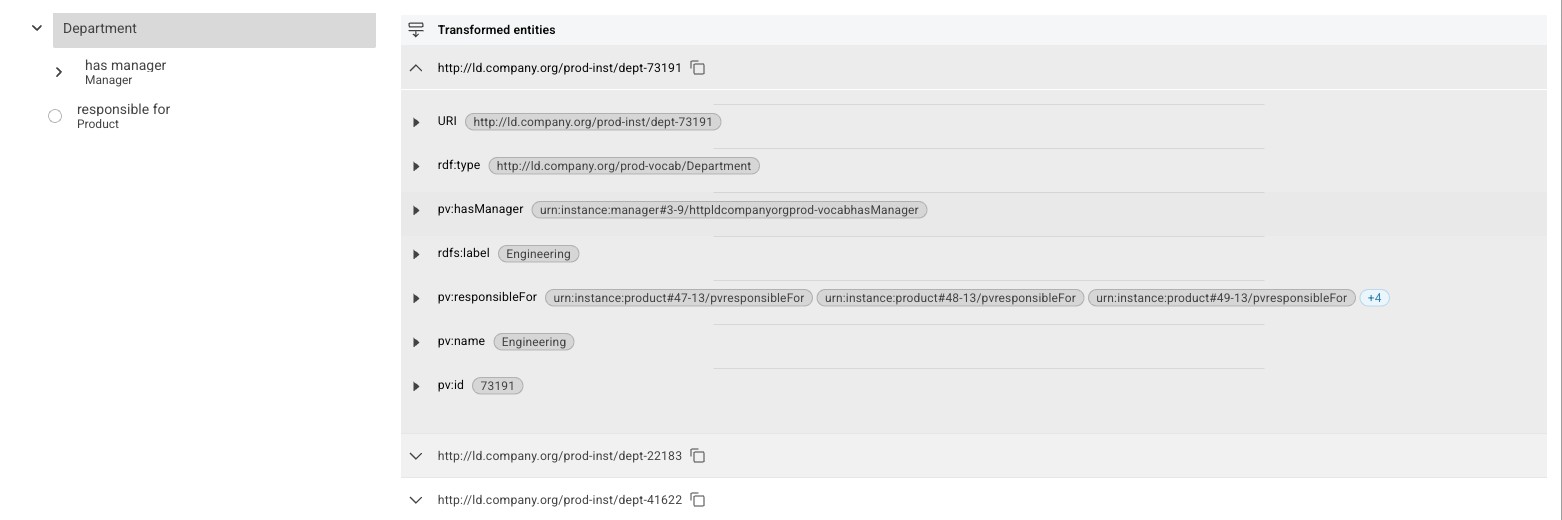
Expand one of the generated entities.
The tab lists the entities the mapping produces and the triples of each one, without writing anything to a Knowledge Graph.
16 Build the Knowledge Graph¤
The mapping is complete, but nothing has been written to a Knowledge Graph yet. The Knowledge Graph is the last node of the workflow.
-
Click the close icon in the top right corner of the transformation window.
The workflow editor is shown again.
-
Click the dot on the right of the
Lift Departmentsnode and select Connect to newly created Knowledge graph.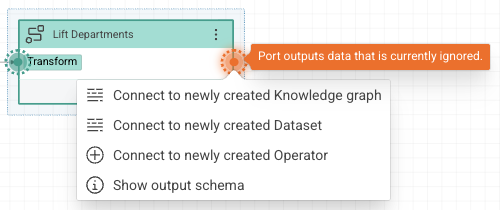
-
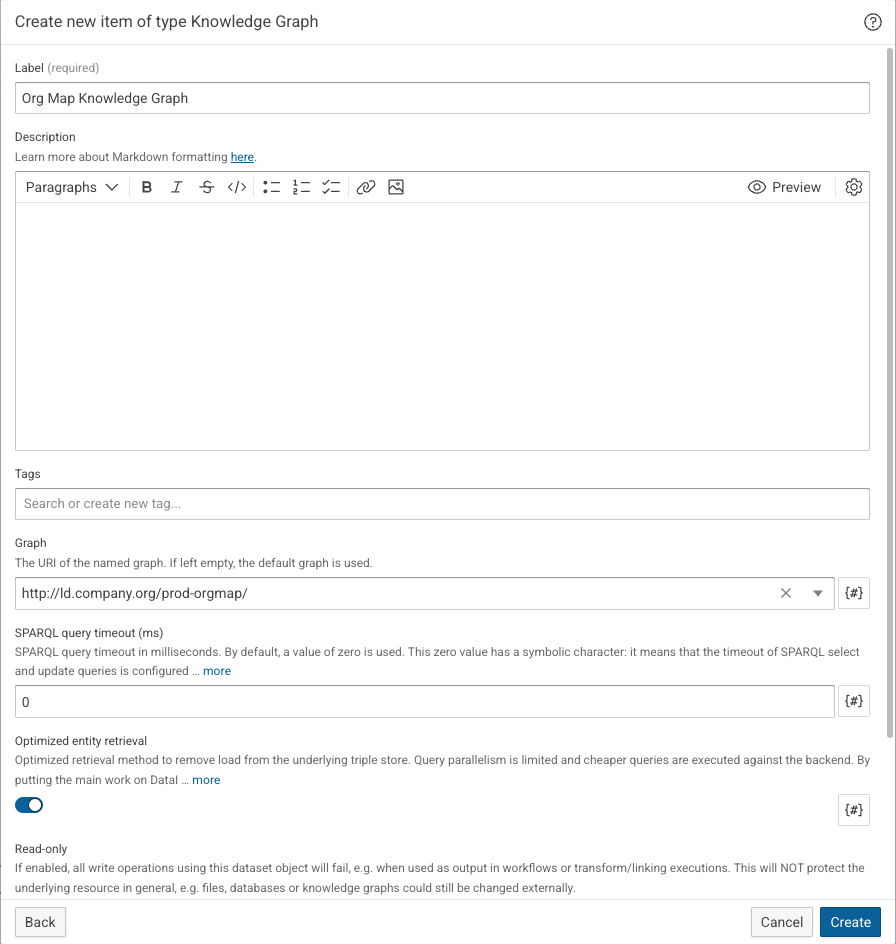
Enter the following values:
- Label:
Org Map Knowledge Graph - Graph:
http://ld.company.org/prod-orgmap/
After entering the graph URI, select the Custom entry suggestion to confirm the value.
- Label:
-
Click Create.
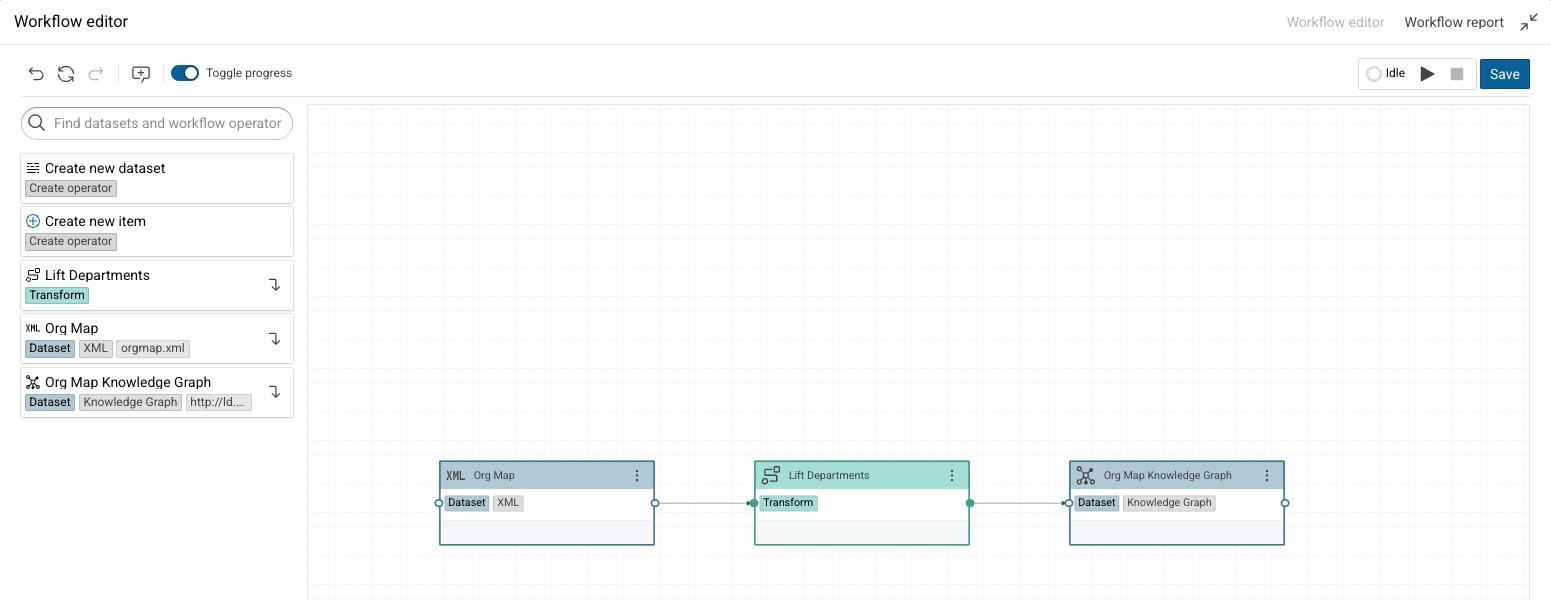
The workflow now connects the three nodes.
-
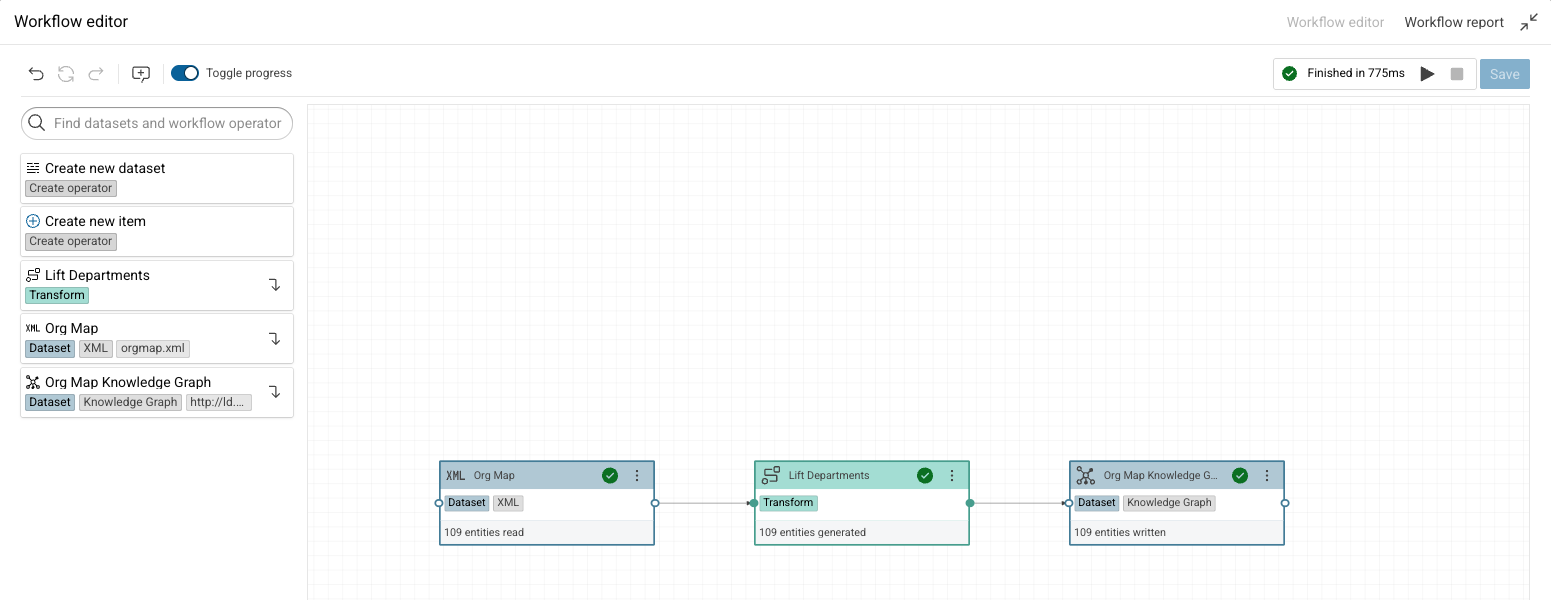
Click the start icon in the toolbar of the workflow editor and click Save and run workflow.
The workflow reads the XML file, transforms it, and writes the generated entities into the Knowledge Graph. Each node shows a check mark and the number of entities it processed.
-
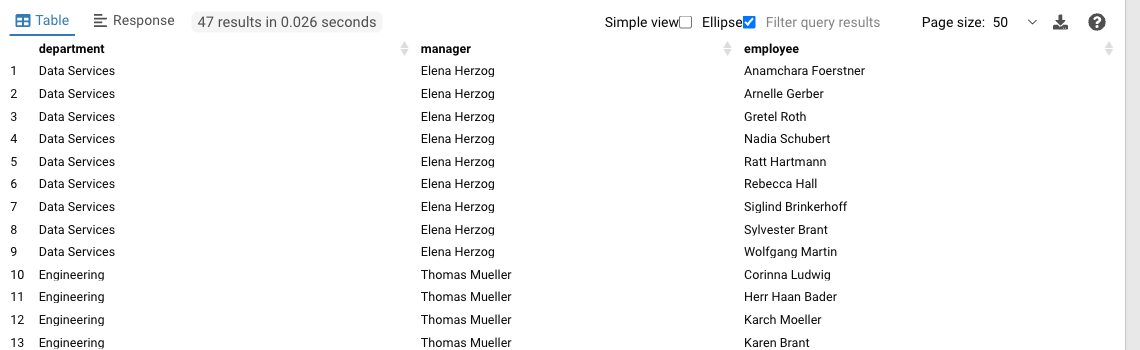
Click the Queries icon in the main menu under EXPLORE and run the following query in the Query editor:
PREFIX pv: <http://ld.company.org/prod-vocab/>
PREFIX rdfs: <http://www.w3.org/2000/01/rdf-schema#>

SELECT ?department ?manager ?employee
FROM <http://ld.company.org/prod-orgmap/>
WHERE {
  ?dept a pv:Department ;
        rdfs:label ?department ;
        pv:hasManager ?m .
  ?m rdfs:label ?manager ;
     pv:hasDirectReport ?e .
  ?e rdfs:label ?employee .
}
ORDER BY ?department ?employee
The result joins the three classes the mapping created.
What to try next¤
- Lift data from tabular data builds a Knowledge Graph from the CSV part of the same sample data.
- Lift data from JSON and XML sources maps hierarchical sources with the classic mapping editor.
- Workflows describes the workflow editor in detail.
- Mapping Creator describes every feature used here as a reference.